Our turkeys are finished and hung from the ceiling clips! Here's the reveal!
Next year, I think I might use a variety of patterns in scrapbook paper for the feathers. Polka dots, stripes, plaids...all in fall colors!
I'm sure we've all had those students who glue things upside down and backward, or cut too far inside the lines. It can be disappointing and frustrating when so much work is done to prepare a cute project! Maybe you can get a few pointers here to help a student teacher or a messy project maker!
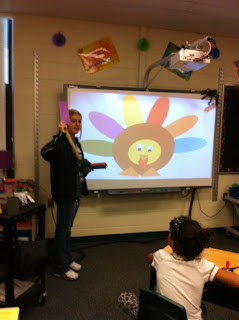
My high school cadet talked the students through this craft as her first "lesson". These are the pointers I gave her. This is common sense to most experienced teachers but not to someone who is just starting out! We decided for her first project to do this whole-group.
Projects 101 for Little Ones
Prep what you can in advance and organize pieces into piles or prebag pieces as a kit. Demonstrate and always have an example so the students have a point of reference. Bigger is better! Love the Smartboard for this!
Review gluing and cutting techniques every time. Chant~ JUST A DOT, NOT A LOT! Too much glue can ruin an otherwise perfect project! Where there is a choice, glue sticks win!
DELEGATE responsibilities like passing out pieces (YOU GET WHAT YOU GET AND YOU DON'T THROW A FIT) and collecting scraps to students or parent helpers so the teacher can attend to the class! You can also have students form an assembly line at a station to pick up the pieces.
Give directions one piece at a time and glue together in small steps. For multiple things to glue~PLAN IT OUT, then check before allowing students to proceed with glue.
HANDS ON HEAD for the next direction! That way the students are focused, not fiddling. Here's one little guy modeling our signal. ROUND THINGS ROLL so stand up the glue stick!
Notice the SCRAP BALL on the corner of the desk. We wait until finished to recycle all scraps at once. This keeps pieces from falling on the floor and getting lost in a big pile. I am trying to teach the students to keep their work area organized. This also helps to keep traffic to a minimum.
SLOW and SMOOTH is the phrase I use in my turtle voice, as a reminder when cutting. Some are so excited, that they speed through and end up with jagged pieces that are too small. I do not make a habit of handing out extras for oopsies instead, I encourage good listening and following directions, so that mistakes can be avoided. That's real life! You don't always get a redo!
DIRTY SIDE DOWN is the next rule before gluing. Most of these patterns have a black line from the copy machine.
NAME ON THE BACK SO YOU GET IT BACK! Always the last step when making a project. It's easier for the students to know what the back is when the project is finished!
Love your project and know you did your best!


Thanks for sharing how you model. :) Sometimes something that can seem so simple really has to be broken into pieces for those little cuties. Your turkeys came out amazing!;)
ReplyDeleteDo you do an arctic animal unit? If so, stop by my blog..I've uploaded my first unit in my TN store and 3 people will get a chance to check it out for free! :D
Sarah
teachingiscolorful.blogspot.com
Love all your reminders for projects!
ReplyDeleteGlad to be a new follower!
Tori
Help Tori get to 500!