Showing posts with label Science. Show all posts

The Life Cycle of a Pumpkin: A Fun and Educational PowerPoint Lesson for Fall Science in the Classroom


When the Halloween season arrives, it's the perfect time to teach your class about the life cycle of pumpkins. And what better way to introduce important science concepts than with a Life Cycle of a Pumpkin PowerPoint Lesson? It's created for your kindergarten, first, and second grade students to be viewed as a big book displayed on your board or added to a computer station. This fun and educational presentation is not just a teaching tool; it's an entertaining journey through the transformation of a simple pumpkin seed into a fine orange fruit through the changing seasons. Your class will love the pumpkin narrator and the real photos! 


Learning the Pumpkin Life Cycle:

This PowerPoint lesson is your go-to resource for making the life cycle of a pumpkin come alive for your students. Here are the key objectives:

1. Identifying Stages: Students will become pumpkin life cycle experts, recognizing every stage, from seed to ripened fruit.

2. Seasonal Influence: They'll understand how the seasons play a vital role in shaping the pumpkin's life journey.

3. Pumpkin Insights: Fun pumpkin facts and visuals of products made from pumpkins, that they may have never heard of, will engage your students.

Special Features:

1. Stunning Visuals: High-quality photographs beautifully capture each stage of the pumpkin's life cycle, making learning visual. It's better than a book about pumpkins because all students can see the pictures!

2. Fun Facts: Engage young learners with interesting pumpkin facts and colorful slides showcasing pumpkin products and their value as a healthy food.

3. Kid-Friendly Language: The language is easy to understand, and the visuals are engaging, ensuring that every child stays connected. Students may be able to read along with you!

4. Aligned with Standards: The lesson to aligns perfectly with kindergarten, first, and second-grade science standards.


Topics Covered:

Our lesson covers a wide array of pumpkin-related topics, including:

  • Pumpkin seed germination
  • The sprout stage
  • The pumpkin vine
  • Yellow flowers
  • Pollination
  • Small green pumpkin fruitlet stage
  • Pumpkin growth and seasonal changes
  • Pumpkins in spring, summer, and fall
  • Fall harvest
  • Requirements for plant growth
  • Popular and unusual pumpkin varieties
  • The art of carving Jack-o'-lanterns
  • A comprehensive parts of a pumpkin diagram
  • Fun pumpkin facts
  • Products made from pumpkins
  • Comprehension questions
  • Quick assessment slides
  • Discussion slides

Teacher Benefits:

1. Ready-to-Use: Zero prep required. You can start teaching right away.

2. Engaging: Students will be captivated, and learning will become a joyful experience.

3. Differentiated Learning: Even students who struggle with traditional text-based learning can follow along as you use these slides to deliver your instruction, especially when read aloud.

How to Make the Most of This Lesson:

This presentation is versatile and can be adapted to your teaching style and time constraints. Here's a sample lesson plan:

  1. Begin with the first slide and ask students what they already know about pumpkins.
  2. Progress through the presentation, explaining each stage and encouraging discussions along the way.
  3. Pause for questions and discussions to ensure students are actively participating.
  4. Review the key concepts once you've finished the presentation.
  5. Conclude with a related activity, such as drawing the pumpkin life cycle or labeling pumpkin parts.
  6. Use verbal or written responses to check understanding with the included question slides.

Our Life Cycle of a Pumpkin PowerPoint Lesson is perfect for primary-grade students, combining engaging visuals with simple language to create the perfect learning experience. 

Don't miss our other PowerPoint lessons on various life cycles, available at our shop on TPT! 

Happy teaching!

End of the Year Classroom Ideas: Second Grade Classroom Fun!

I seriously feel like I did one thousand things this week! I'm beat. But... it's our VERY LAST FRIDAY!!! Yippee! We had a rip roarin' good time this week with our end of the year fun stuff and actually worked in a few learning activities too! 


I was so excited to get home to check my mail all week. It's a long story, but there was no mail. At all. For weeks.
 But...look at what arrived just today!


Happy Happy! I purchased these pencil door signs from Tallahatchie Designs at Etsy to give as an end of the year gift for my teamies! I think they are going to love them. I love the colorful ribbons the best. They are all a little different.


If you read my last post, you know that we had something special planned each day for our End of the Year Extravaganza

Here are a few snapshots of our bubble day:

We also had a campout read-in, a movie day, an electronics day, outdoor picnic-style summer birthday celebrations, a princess on her way to the prom visit, a guest reader, an AR assembly and raffle, the PBIS prize cart, sibling visits and classroom switches and a board game day (just to name a few). WHEW!

Student Reading with a Flashlight

A little at a time, while my second graders were having all of this fun, I was able to put the finishing touches on report cards, complete student records and get organized!
 I am feeling accomplished!


It might look like all fun and games, but the kiddos did actually do some work! One thing we did was to wrap up our science unit and put together our matter lunch bag books. This time I used red bags from Target! 

Matter Minibook


It's Pizza Box Keepsake time so we did that all week in stages. This year it all went so smoothly!  Three fifth grade students from my Science Olympiad team came down to assemble our boxes. Coloring the cover and completing the memory pages that go inside was done a little at a time during the week. On assembly day, I delegated project passing to a few students at a time. It was a snap since most projects actually had names on them this year! :)

End of the Year Teaching Ideas
So that's it for classroom stuff! 


Is anyone else completely exhausted??? It's hard work having fun (planning it too). This is my selfie version of "There is no tired like the end of the year teacher tired".   


Three more days folks and I am home free!


We Love Teachers Sale at TPT!


IT'S HERE! The look on this cutie's face says it all, doesn't it?! I'm SO excited! Time to work on your wish lists and get set to SHOP! 
 Thank you to Ms. Beatties Classroom for the adorable sale banner!

Everything at my Creative Lesson Cafe TPT store will be 20% off during the sale and with the promo code, the deal is even sweeter! 

Each and every one of the items in my shop is something that I have created and used with the first and second grade students in my classroom. These are just a few of our favorites! You can take a peek here by subject/ category for a little preview of  some of the items you might like to grab for your kiddos too!  


If these resources look like fun and something you can use too, you can find all of them by clicking {here}.


Hope you have a fantastic Teacher Appreciation week! 
Happy shopping!


Second Grade Science Experiments, Math Manipulatives, Landforms, Oreo Spiders and FREEBIES!

I'm really excited because today, I am linking up with Deanna Jump and other bloggers for my FAVORITE chapter in this Worksheets Don't Grow Dendrites book study! It's all about manipulatives, experiments, labs and models! I could go on all day about this one! Read on to see how I use this strategy in my second grade classroom! This post is heavy on the pictures, but I hope they will give you some great ideas! You can also pick up a few FREEBIES along the way!


When I think of manipulatives, experiments and models, science and math come to mind most often. 

I like this quote from the book Worksheets Don't Grow Dendrites: 

When learning is active and hands-on, the formation of neural connections is fascilitated and information is much more readily remembered than information learned from an abstract viewpoint, where the teacher is doing the work, while the students watch. (Gregory & Perry, 2006)


In math, I try to begin each new unit with some concrete work with manipulatives to build the foundations before moving on to any pencil/paper tasks. The use of manipulatives and models also creates interest and gets students motivated to learn more! When a worksheet is necessary, I like to also have the students model with manipulatives at the same time

Comparing handfuls with greater than and less than symbols using counting bears.
Counting Bears Manipulatives
Making ten- addition sentences with Skittles on a ten frame mat.
Ten Frames Activities
 Judy clocks to model time while using task cards.
Telling Time Activities
Partitioning shapes and modeling fractions of a set of 12 jelly beans.
Jelly Bean Math

Making the transition from observing and identifying coins with play money to the paper task- using coins on top of the worksheet.

Second Grade Counting Coins


I am fortunate to have a classroom FULL of manipulatives and models to use as teaching tools. When I model concepts, the students can model along with me!

We made pipe cleaner number racks for subitizing and fact practice.
Second Grade Math Manipulatives


  These are just a few of the models and manipulatives we use and those that I could easily find a photo of for you!
What are your favorite math manipulatives? 


 Science is my favorite subject to teach! I try to bring hands-on experiments and inquiry into our themes every chance I get. As with anything, I wish there was MORE TIME! Here are some experiments that my class just loved! 

We planted amaryllis and paperwhites this winter. It was really neat to see the roots and the bulb. You don't have to have a green thumb for these. They grow without any TLC. This came as a planting kit and they had already sprouted without soil or water!

Plants Experiments for the Classroom

We do lots of experiments with candy and other fun seasonal items. Be sure to click on the links to grab some FREE lab sheets! Yes, they are a worksheet in a sense, but it is helpful for the students to draw and write their observations and conclusions. It grows more dendrites! 

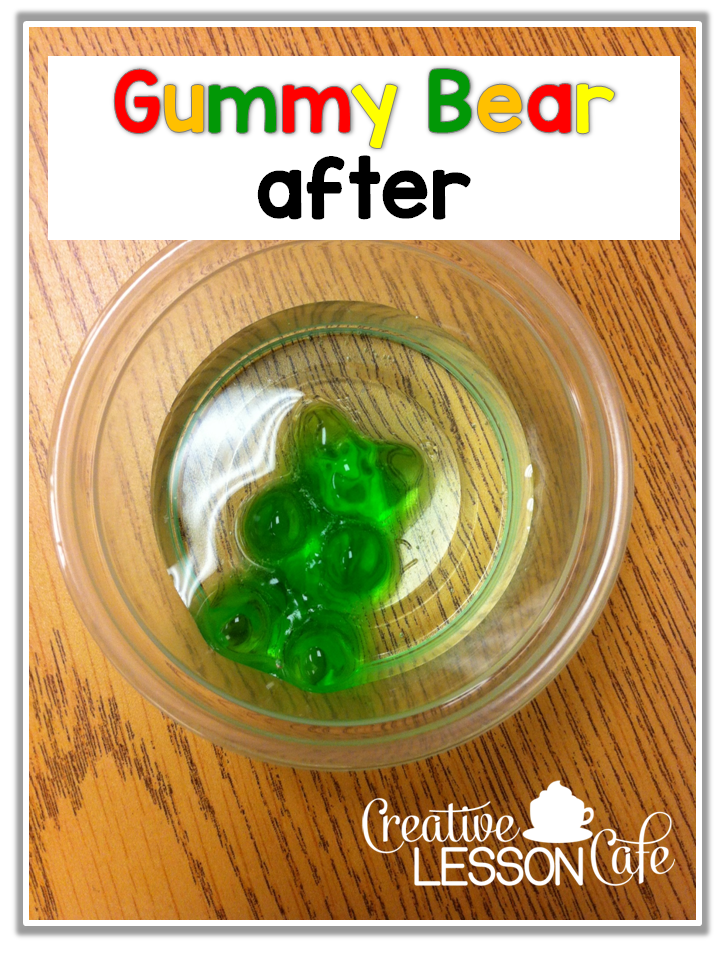
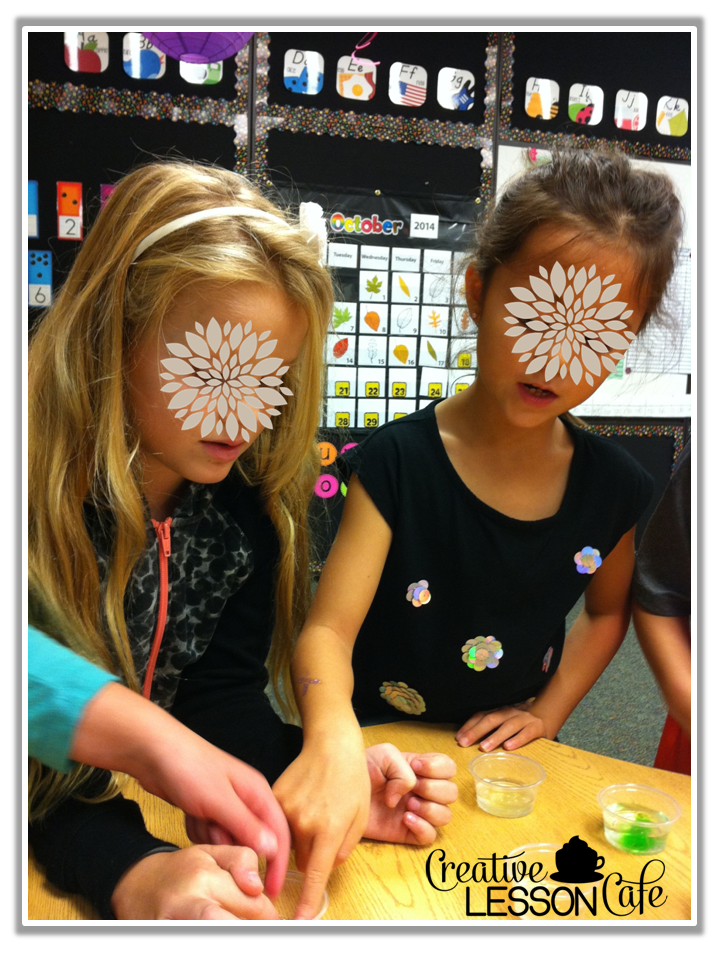
Gummy bears experiment and lab sheet.

Gummy Bears Science Experiment

Candy hearts experiment and lab sheet.

Candy Hearts Experiment

At Halloween, we also experimented with candy corn. You can grab a copy of the lab sheet too for next year!

In some subjects it is also possible to build your own models! Talk about growing dendrites. Creating is at the top of the taxonomy!

 We built Oreo spiders as we learned about the body parts!

Oreo Cookie Spiders

When studying landforms, we build salt-dough models on pizza rounds, paint them and label them.

Landforms Projects

The best of all worlds for me is combining both math and science concepts with models, manipulatives and experiments into a great STEM activity like this one!

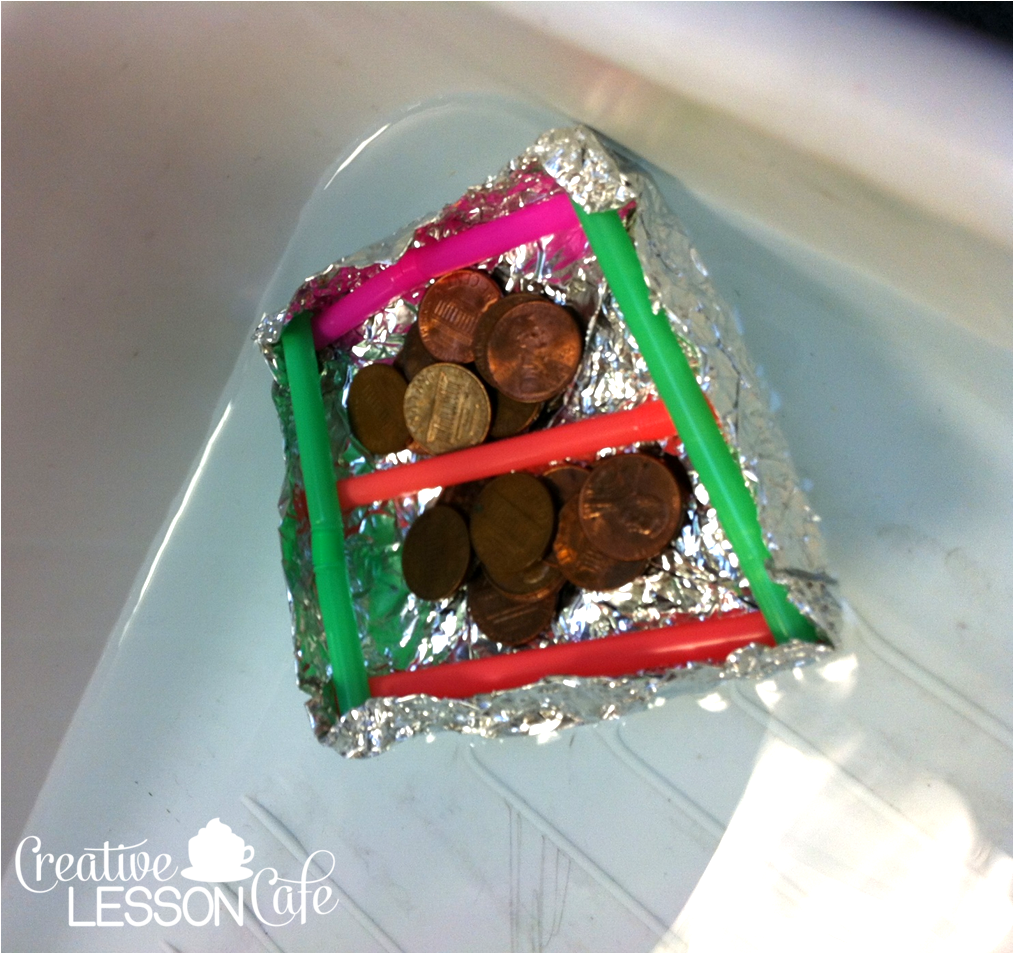
Penny rafts STEM challenge.

Penny Boats

My big TAKEAWAY from this chapter was that I need to keep doing more of these types of activities. I hope to work the same ideas into other subject areas

 Thank you for stopping by! I hope you enjoyed this post and can take away some new inspiration for implementing ideas for strategy 7 in your room! 


:)


A Sweet Valentine's Day Activity for Second Grade: Candy Hearts Science Experiment FREEBIE


Hi everyone! Are you all set for your Valentine's Day activities? Maybe you need just one more idea... :)  I might have a great one here for you to try! This year, rather than the traditional Valentine's Day candy hearts graphing and all of that other great stuff I'm pretty sure my students already did last year, I am going to mix up our fun with conversation hearts!

You may remember how much my class loved our experiment with gummy bears, so I thought they might really like trying a similar experiment with a different treat! Your class might love it too and you probably already have what you need!

My readers know how much I LOVE teaching science! I used to work as our district science specialist teaching only hands-on science to elementary students, so it's sort of my thing! Because I have not done this in about fifteen years, I don't have step by step photos for you (yet), but the idea is to observe to see what happens to the candies in a variety of liquids. 

Supplies:
  • conversation hearts
  • water
  • vinegar
  • Sprite
  • bleach
  • small plastic cups
  • one large clear glass
I don't want to be too much of a spoiler and give it all away, but it is really neat to see what happens to the candies. In vinegar, they fizz and the hearts dance when placed in a tall glass full of a clear carbonated beverage. Experimenting with the bleach is one I model in front of the class for obvious reasons.

Of course, we always need a lab sheet to record our steps to the scientific method! We will do the lab write-up on only one of the experiments, not for every liquid. 


If you like it, you can grab this freebie lab sheet {here}! 

Maybe you can round up a few supplies and work in some Valentine science fun with your class too!
 If you give it a try, let me know how it goes!
:)


Candy Corn Experiment and Freebie

What would Halloween week be without a little candy corn? You couldn't pay me to eat it, but it sure does make for one great science lesson! You can even whip this one up for tomorrow if you wanted to add some science fun to your crazy day! This is one activity the class will remember!

All you need for this one is a small cup, some water and one piece of candy. You can give one to each student or just use one demo for the whole class to come to observe. 

The students asked the question...What will happen when I place a candy corn in water? Most students thought it would dissolve ( YES! They didn't say melt!). Others thought it would get bigger like our gummy bear did in the last experiment, and some thought it would get mushy. 


The changes happened quickly as the students exclaimed that the candy corn was shedding its skin! There is a candy coating that gives the candy corn its shiny smooth texture. That part separates and floats away first.

We waited for about ten minutes and then observed our cups again. 


What was left looked like orange Kool-Aid with a white floaty blob. 
Not a very scientific description, but it works! 

I made a recording sheet for this experiment. 

You can download a copy {here} if you like!
 There's an all black and white version too.

Are you all set for the big day tomorrow? It's the perfect set up for little angels to be transformed into ghouls, isn't it? Kiddos are so excited and going bonkers right now. Something like this might be the perfect thing to keep the calm for at least a little while! 

Here's a throwback this Thursday of my sweet little trick-or-treaters when they were little! 


I wish we could do it all over again!

Whatever you do tomorrow, have a very happy Halloween!
;)

Sweet and Simple Science! Gummy Bears Experiment

Happy Sweetest Day friends! Since I am thinking about sweets... I thought I'd share a sweet little lesson from last week. What better time to do activities having to do with candy than in the month of October? We decided to do some simple science with gummy bears!
The question was asked..
 What will happen when we place a gummy bear in a cup of water overnight?

All you need for this experiment is a package of Haribo brand Gummy Bears, some water and small cups. How easy is that? 

These containers from Target were the perfect size. 


So before we plopped the gummy bears in our cups of water, the students made all kinds of great predictions (they are learning the word hypothesis... but haven't been able to say it without a lisp yet)!

Many thought it would melt, so we clarified the difference between melting and dissolving. Others thought it would get slimy. A few predicted it would change color. One student had done this before and she was sworn to secrecy

But no one predicted what would actually happen!


Our bear turned into a mini Jello mold!

As we conducted the experiment, the students recorded the steps of the scientific method. They drew pictures of their observations and listed the steps to the experiment. 

You can grab a copy of this lab sheet here if you think you may want to try this with your class. 

My blossoming scientists were so excited to see their gummy bears and make more observations the next day.


A great variation on this experiment would be to try out different liquids to see what the results would be. You might also repeat it with a different brand of gummy bears to see if all gummies are created equally!

I hope you got some sweet inspiration here today. 
This was a fun and easy way to practice the scientific method.
Maybe give it a try some time!

 I will be back here again tomorrow morning.
Please join me!
 I've got a few SURPRISES in the works for you!
:)


Apple Experiment~ Simple Second Grade Science Fun!

Apple week is so much fun! One of my favorite activities is to introduce the scientific method to my kiddos with a quick and easy science experiment. It takes just a few easy-to-find materials and a few minutes of time~ the perfect combo for the busy teacher!

We wanted to see which liquid would keep our cut apple slices from turning brown. You know the experiment and the results! In a perfect world, each student would ideally have their own apple slices and materials, but we did it whole-group instead. This was such a great way to set up the table and all of the credit goes out to my student teacher, Liz, for this one!

A while ago, I came across this great recording sheet to use.


  Each child came up to the table to make their observations. 


 We also put the apple under the document camera and displayed it on the SMART Board so everyone could see!


This was super simple, apple~icious science fun!
 The kiddos loved being little scientists and I loved watching their excitement! 

Dancing Raisins Experiment: Simple Science Fun!

We had good, fizzy fun with the scientific method today as we performed a dancing raisins experiment! This one is a favorite of mine every year because it is so simple to prep and set up. All you need is some Sprite, a clear cup and one raisin for each child. Then, drop the raisins in the soda and watch the magic of science excitement fill the room!


This was our introduction to our Being a Scientist unit. 
We talked about each step of the scientific method along the way using these cute cards from Ginger Snaps
The kids felt like REAL scientists as they created a hypothesis, made observations and recorded along the way with a Raisin Experiment lab sheet from What the Teacher Wants

Thankfully, it doesn't say Dancing Raisins at the top of the worksheet because that would be a spoiler!
 I wanted the kids to be totally surprised and they were!


 Some students thought the raisin might explode. 
Others thought the pop might turn brown. 
One student was sure the teacher was going to shake the whole bottle of Sprite first and let it erupt everywhere! 
He must have seen that Diet Coke and Mentos experiment on an episode of MythBusters!


The kids were bursting with excitement as they saw our raisins begin to dance! 

We talked about how the carbonation in the pop is air. The bubbles attach to the rough surface of the raisin. When enough bubbles form, it makes the raisins bouyant and they rise to the top. At the surface, the bubbles pop and the raisins sink again.
 This was also a great experiment for tying in some review of solids, liquids and gases.

We decided NOT to dump out the cups afterward, but instead will leave them all weekend and return to make more observations of the changes we see on Monday! 

I just love seeing the kids get so excited about activities like these. 
I wish we had time in our days to do more!

This would be a super easy thing to have ready to go to keep your students engaged in the last remaining days! 

What are some of your favorite simple science experiments?


Related Posts Plugin for WordPress, Blogger...