Showing posts with label Classroom Organization. Show all posts

7 Important Teacher Tips for Returning to School After Winter Break

Whenever we take a pause from our usual classroom schedule and work life, there's this phase where we all need to readjust and regroup. Returning to school after winter break is no exception! After a few weeks of staying up later than usual and enjoying lazy mornings, getting back into a routine can be very challenging. That's why a little pre-planning can go a long way in making it a smooth and less shocking first day back for everyone! Check out these teacher tips that are guaranteed to help you and your students have a smooth transition back.


1. The Morning Mixed Feelings Greeting

We know how important that morning greeting at the door can be for welcoming our littles. It's especially important to meet and greet on the first day back to acknowledge the many emotions that a return to school brings.

Some students may be overly excited and full of energy, while others may be sad, anxious or even lethargic. It's a great opportunity for you to assess the overall mood of the class to be prepared to head off any meltdowns, separation anxiety tears or behavior problems before they occur.

2. Allow Extra Time for Sharing

If morning meetings are a regular part of your routine, after students are unpacked and settled in, gather together for some classroom community sharing time. Allowing students to tell about their winter break is a great way to get it all out so they can better focus on learning activities.

It often takes a long time to share out with a group of 24 or more students, so consider a think, pair, share activity rather than circle time. You can work in several partner rotations in a short amount of time. It has been my experience that shy and reluctant students feel more comfortable in a partnership.

I use partner pairing cards to quickly assign random classroom buddies for partner activities. My class loves to do stand up, hand up, pair up with them as they seek out their partner who has the matching card.

Before any talking begins, you can share YOUR winter break activities or holiday celebration stories with your students by modeling what a good discussion might look like as well as what good listening behaviors look like. It's a sure way to hook them in and get their attention because kiddos LOVE hearing details about the great mystery of their teacher's life outside of school!

3. Review Rules, Procedures and Expectations

Get your class back in the groove and make sure that there are clear expectations for behavior, classroom routines and for following established classroom rules to get the year started off on the right foot.

Going over absolutely everything at once is a little overwhelming and negative, so a reminder before the start of any transition like your unpacking procedure, line up routine, or lunchroom visit is a great way to break up these reminders. Little bits at a time will guarantee things run more smoothly.

4. Ease Back into Learning

There is almost always a bit of what I call vacation brain or learning slide following any break from school, so this is the perfect time to review lessons that were started in December before moving forward.

It's time to pull out a few no prep review worksheets, plan for a read aloud story that has supplemental lesson activities, or to have ready to go learning activities like PowerPoint lessons, task cards or writing centers. Focus on high interest, fun and engaging lessons for the students and that don't require a ton of prep work.

I like to start the day with a New Year word search (freebie) that students can work and here and there throughout the day.

Here are some really fun winter themed math and ELA task cards for a get up and move scoot activity that my class really enjoys!


I try to have these types of activities copied and ready to go before break and in a very visible place like smack dab in the middle of my desk, so I do not forget what I have planned for day one!

5. Set Classroom and Personal Goals

Even if you head back a week after the New Year, it's never too late to have your students adopt that growth mindset and set new goals for school or home. This New Year Goal flap book is an easy way to accomplish this and, the best part is, at the end of the activity, you have a ready to go January bulletin board display of student work!


6. Declutter and Organize in Small Bites

At some point in the day, give students a chance to clean out their desks or cubbies. Have a few trash bins throughout the room if possible to minimize the traffic flow and chaos.

But instead of a full blown, take EVERYTHING out and stack it up (and hope it doesn't slide and crash onto the floor in a rainbow explosion of lost crayons and pencils), challenge students to do it in small bites that are manageable throughout the first week. Directions like find five bits of paper to throw away or put three supplies back in your pencil box... break this daunting task down and reduce the mayhem that desk cleaning may bring about.

Organizing student desks in two halves helps them find things easily. Supplies go on one side, and workbooks, notebooks, and spiral notebooks on the other. A ready pencil is kept out of the pencil case and that prevents the banging and clanging of boxes during transitions to pencil paper tasks!


My students know the desk fairy visits them regularly and leaves a note and a special treat so they are really motivated to keep up on things in their own personal space. You can grab some free desk fairy notes at my TPT store!


With January weather keeping many classrooms inside, consider asking if any students would like to help with an extra organizing job or two during recess or when they finish a task quickly. What we teachers see as a chore, some students LOVE!

Students have a great time helping out with classroom and teacher things that are a privilege to handle like classroom manipulatives or the teacher's read aloud library! My students used to beg for extra jobs instead of playing and when working on a task with with a group of friends, they had so much fun!

While I supervise the students doing their organizing and clean up work, I get going on purging any leftover December and holiday stuff in the room and clear out my Monday through Friday drawers to be sure I have room for new copies, read aloud books for the week, learning activities and projects that need to be prepped.


Decluttering your computer and desk by deleting old emails, voicemail messages, notifications and desktop files is a great thing to work on during prep the first week back. Maybe it's time to tackle the secret hoard in the desk drawer too! :)

Even ten minutes a day spent on organizing will keep your home away from home clutter free, stress free and much more manageable.

Maybe that would make for a great New Year goal if you haven't already started on your path to organization!

7. End the Day on a Positive Note

You made it through so be sure to recognize and compliment your class on a job well done so that they leave your room feeling ready to give you their best this week.

An end of the day game, Go Noodle dance off or even a special treat like a bag full of hot chocolate snowman soup is a wonderful way to keep it positive when you send students on their way and to get all of your kiddos excited for another day of classroom fun and learning!

Conclusion

Facing the return to school after a break can be challenging for everyone. However, by recognizing that students have many different feelings about coming back and giving them the opportunity to share their experiences, reviewing academics and classroom expectations, you can establish a foundation for a successful, organized and goal-oriented start to classroom learning in January!

Happy teaching!

You may also enjoy these blog posts:


Magnificent Magnets for Teachers!

Happy Monday everyone! Hope your weekend was super duper! Today I am here to share some of my MUST HAVE school supplies! 


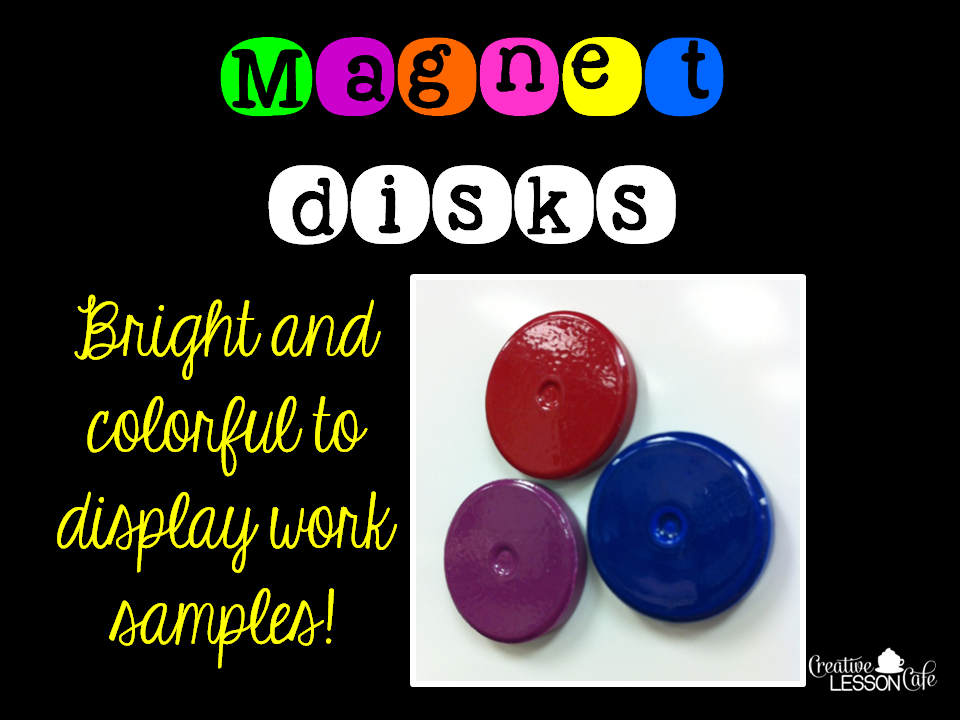
One thing I absolutely cannot live without are my whiteboard magnets. Without a collection of magnetic items, my classroom would literally fall apart. Because nothing stays up on my cinder block walls, I use my whiteboards as display boards. These magnificent magnets are my favorite school supply!


 If you are doing some back to school shopping soon, you may want to add some mighty magnets to your list!


What is your must-have supply for the classroom? 
:)


Classroom Organization: Storing Paper


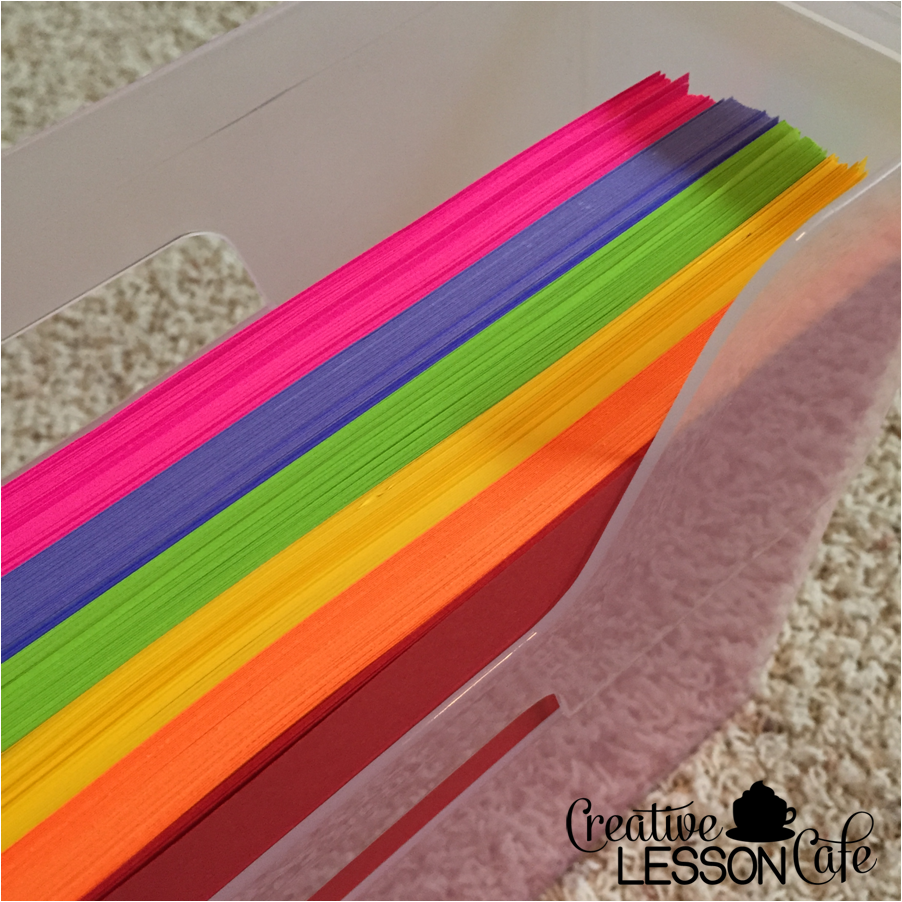
It drives me nuts when I go to pull out some paper and half of the stack comes out along with it. A while ago, I saw a great tip for storing paper in a filing crate. Of course, I did nothing with that idea until I started organizing my office space at home this weekend.

 I had this small file tub I ordered from The Container Store and discovered that one ream of paper fits inside perfectly (with a little wiggle room)! 

TA DA! 
The perfect Astrobrights rainbow! 


Goodbye crumpled paper! 
I will also set up a bin just for cardstock and another for white copy paper.

Hope you can use this idea for your next organizing project!

:)

Classroom Organization Tips for Teachers!

 Welcome to Creative Lesson Cafe Friends! I'm really excited to be part of this blog hop with my friends at Primary Powers. We are here to save the day with some SUPER ideas for organization! I'm here to share ideas for organizing your teaching resources and important papers.


My classroom appears very organized. I try to manage the great paper shuffle as best I can with plenty of storage containers, plastic drawers, files, labels and bins.

 But...what is inside some closed drawers is a problem. One disastrous area is my file cabinet. My cabinet is completely stuffed with unit files and favorite teaching resources that I want to save, but that I don't use on a regular basis. It's REALLY frustrating to file new things away or browse through files when they are so packed in together. My cabinet is in good condition, but still it's an eyesore I want to eventually hide away in my storage closet.

If you are looking for a great way to easily organize your favorite and most-used masters and resources, you may want to invest in a few hanging file tubs. I did!

 I am getting ORGANIZED one subject at a time! 


Each subject area will eventually have its own file tub. 
 One is going to be my assessment bin.

Target carries these fantastic clear containers with lids.
{Room Essentials Box File} I ordered six of them.


Because they are see-through boxes, I wanted some pretty hanging folders. The Container Store sells bright folders in a rainbow of colors and I ordered a set of each to coordinate with the tub signs. Inside, I have decided to organize by skills and units.


I made some square signs that fit perfectly on the front of the box! If you want to get organized with some tubs too, you can download a set of the signs {here}! They should look great on any size file box you happen to have or purchase. 


 Just imagine how cute these new handy tubs- set up in a rainbow of organization- will look in my teacher corner! I can't wait to get them all done and finally put an END to the file cabinet frustrations!

Hopefully this post has given you some cute inspiration to continue to work at being as organized as possible with the great paper shuffle too! 
:)


Classroom Storage Ideas for Centers and Crafts

It's a fact. Teachers have a lot of STUFF. It can seriously take over the room and bury us alive if we let it! I am back today to share another tip that really helps with classroom organization. My Weekend Warriors friends are also here to share some swell October Organizing ideas with all of you.

This post is all about...


When I found out I would be getting oodles of math centers and manipulatives with our new math series, I honestly had mixed feelings. I am excited to have all of these great materials, but I am pretty much out of storage space without new STUFF coming into the room. If you have storage issues too, you might try what I did!

 If you need to conquer the clutter...hide it and stack it up!

 For storage solutions for my math manipulatives, centers, craft pieces or just about anything... 
 I now look for stacking tubs with lids.


I purchased lots of these beauties at Lakeshore. They were a bit pricey, but SO worth it. They last for years and come in a variety of great colors. I picked up two different sizes. One set is shallow but wide enough to hold recording sheets, game mats and all center materials. Because they have lids, they stack and that saves space!


The other set is deeper and perfect for manipulatives, card sets and other things. 


What I love best about these tubs is the fact that they are so colorful and fun.


 My new bins are great except for the fact that you cannot see what is inside.
 It really helps to have some clear containers for things too.  

I like everything in its place and prepped way in advance.
Here we have my crafts for the rest of October and into November prepped and stored away in Sterilite containers from Target. All of my turkey project pieces are copied, cut apart and ready to assemble!


When our Fun Friday crafting begins, I simply pull out a project tub! 

My goal is to continue to add to my container collection and eventually label everything. It will be a work in progress!


2 Simple Tips for Helping Young Students Learn to Organize Desk Supplies

The one thing that really saves my sanity with my own organization is when I am not distracted by my students being unorganized! 

How many times have you heard this? 
When we are ready to get started on something that involves the students taking out a supply of some kind, I like them to be able to do so quickly and quietly, so we can get the show on the road. Things falling out of desks, supplies getting lost, folders getting ripped and mangled and paper/snack wrapper stuffing are a few frustrations we can all do without. I hope these tips can help your class be more organized!


Spending some time to teach the class to do these two simple things may help those of you who have an issue with desk-cluttering, pencil- fumbling students! 


Because we have desks, not tables, I require that my students keep one, what we call a READY PENCIL, in the side of their desk. The eraser side needs to be showing out and the pencil pushed in against the edge of the desk. That way it won't roll out. When it is time to take out our most frequently used supply, we just grab it out from the corner. It does not involve dragging out the entire noisy pencil box. This one simple trick has saved so much time!

Notice that the books, folders and notebooks above are all nicely stacked. This too was taught and reinforced daily for the first month of school. We divide our desk into two sections. The opposite side is for all other supplies like crayons, glue and pencil boxes.


The students have done a great job keeping their desks tidy without reminders. They still look the same after nearly two months in school. All because we took that extra time to think about and practice organization. I hope they carry these tricks with them through the grades.


To encourage neatness and organization, consider having the desk fairy visit and reward students with a special treat on (or in) their desk!

 I just had to use these cute little fairies from my friend Jen over at Teaching in the Tongass!
 You can grab a copy of the desk fairy notes {here} if you like!

If you have a great idea for organizing, we'd love to hear from you in the comments section.

If you enjoy our monthly tips and tricks, a great way you can keep in touch with the Weekend Warriors is through our Pinterest Board!

 We have quite a collection of awesome ideas to share so Pin away!


 Be sure to follow us there so you don't miss a thing!

This is a great place to come together and share ideas!
 If you have a great tip for organizing, we'd love to hear from you in the comments section. 


Number Corner Set-Up Photos~ Our Calendar Math Powerhouse!

Today's photo tour post is dedicated to all of my Bridges in Mathematics friends who have just been handed your brand new series and the loads of great materials that come along with it. I hope you will get some good ideas for your room too, even if you don't use Bridges!  

Getting set-up for Bridges number corner activities and math workplace stations can be confusing at first. I'm a visual person, so to get ideas for my set-up, I searched the web for photos of how other teachers set up their rooms. I am here to pass on some classroom photos for others who are searching too.

This is my September number CORNER for second grade (a work in progress), which actually is more like a HALF WALL. 


The biggest black pocket chart EVER needs its own bulletin board. 


Because this chart is now the focal point in my room, I went to work adding a pop of color with a poppin' patterns calendar set to match my room theme. 


I replaced the month header with a colorful one and placed small calendar numbers in front of the white cards. Once turned over, the numbers hide behind the larger card.

The letters from this easy bulletin board titles set came in handy for this colorful sign I printed on Astrobright paper.


 Make Way for Number Corner!
Room Arrangement Tips

  • You will need quite a bit of room for displays, materials and for a gathering area, so rearrange the desks and tables to create an open space. 
  • Two bulletin boards are helpful. One is for the jumbo pocket chart and the other to hang the Daily Rectangle grid. You can see the red and blue tiles on my grid. 
  • Below the grid, consider using a shelf to store your teacher number rack, student whiteboards, workplace bins or any materials you will need handy during number corner. 

  • There are many items to prepare for displays, vocabulary work and activities for each month. These will need to be hung as well. I have mine on two whiteboards next to the pocket chart.
  • It is recommended to have a chart stand for your calendar grid observation charts and monthly skill charts that need to be created on large paper. I typed mine up and will someday enlarge them as posters so they can be saved and reused. Plus, I had to add some clipart from Melonheadz!
 These charts change every month, so I am hoping that having a master in digital format will make editing easier.


Super Teacher Tools

Because many daily activities require that you record using a dry erase or wet erase marker, it is helpful to have a magnetic marker holder and whiteboard eraser. 


I also purchased magnetic sentence strips from Lakeshore for the calendar collection titles and date. 


My favorite purchase is the small black storage ottoman from Target that I use as my teacher stool/ binder rest. I love that I can be down at the students' level.

 I'm sure my number corner will evolve as I figure things out and see how they work for my class.
 I will keep you updated!

 Now if I could only make sense of my binders... 
If you have Bridges, you know what I mean!

Have a happy rest of the week!


Teacher Lesson Plan Book Makeover: From Drab to Fab!

I cringed the other day as I handed off an ugly brown school-issued plan book (the one that comes with carbon paper in the back) to my student teacher. Yes, they still exist! Personally, I prefer to have my lesson plans in an actual book I can carry around, rather than on the computer or in a binder. There are lots of reasons for this, but mainly because it is what I am used to! Plus, I can work on plans in the waiting room, outside while monitoring recess, at team meetings or wherever else my book can travel!

The format of my favorite FREEBIE plan book from Lakeshore is perfect for my planning needs! I love the layout, but the cover....not so much! This book is the focal point of my desk (when it is clean), so I'd like it to reflect my theme and style. So, I hide the cover!


A few years ago, I found some cute and FREE plan book binder covers in a variety of designs from Teaching in Flip Flops. I printed and laminated one, then rolled clear packing tape to the back and stuck it on top of the not-so-attractive cover! Now each year, when I change books, I simply remove the cover from the old book and switch it up! This is year three for my cover and it is still like new!

There are many other things in my room that I want to transform from drab to fab by adding my own cover the same way! I have some oldie but goodie resource books with worn out covers...they are next on the list! :)

I've seen other ideas similar to this for decorating student spiral notebooks and that is just super too!
If you have a great idea, I'd love to hear about it in the comments! 


Student Name Labeling Using Address Labels: Free Template for Teachers

 Have you gotten yours yet? I got it! The long awaited class list! This is when things start to get exciting! I love to look at the student names knowing that soon I'll be putting faces to those names and that we will be spending the year together as a little classroom family.

 Once that list is in my hands, I immediately GET TO WORK! 

Read on and I'll tell you how I cut costs on labeling student supplies like folders and cubby tags, while saving precious time!


Before leaving for the summer, I stocked up on some colorful blank name tags from Creative Teaching Press. I slap on an address label and then laminate them to use for cubby tags. They are fun and colorful, AND I use very little ink that way. As a matter of fact, I slap those address labels on everything~ student folders, workbooks, composition books, spiral notebooks, job rotation cards, job boards...you can see my post about that and some pictures here.

Last year, I provided a link to download the template from Avery. I have found that some sites ask you to install or allow other things and that always makes me nervous. For the same Avery template from someone you can trust :), you can download a freebie from my dropbox if you like. Just click on the image to take you there.


This is what you will see when you get to the document. Be sure to click on the arrow in the corner to download it!
 Then you can make changes!


I took the liberty to start typing for you! Just backspace away my names to add your own kiddos! Reduce the font size to add last names so the text fits in the space. These fit Avery brand 8860 the 1"x 2 5/8" size.

The template freebie is very plain Jane, but I always make some for my nieces with a little clip art flower or some fancy, colorful fonts! You might try that too!


What creative, time-saving ways have you found to use address labels?


Sailing Theme Classroom Decor Set and Labeling Kit TPT

Are you ready to sail into a new school year with a new classroom theme?  I'm SUPER excited to share a brand new classroom decor set with you! This one has an adorable nautical and sailing theme! I love it so much I want to do a complete classroom makeover! :)
Have you been dreaming of a new classroom theme for you room too? Maybe you are setting up a brand new classroom and looking for an easy way to decorate, organize and label. Well, this kit has labels, posters and signs galore!

The great thing is that most of the printables are completely editable!
You can use these shapes and pieces any creative way you like to go labeling CRAZY!
To see more of this set and read the full description, you can view this item here!

I hope you like this set too! 
If you do, leave me some blog lovin' or Pin this set for me!


I'll leave you in smooth sailin' mode with one of my treasured photos.
Meet my two favorite sailors! 


This is my awesome and fun-lovin' uncle taking my buddy for a cruise down the river!
GREAT TIMES! 
Love ya UJJ!


Related Posts Plugin for WordPress, Blogger...