Candy Corn Experiment and Freebie

What would Halloween week be without a little candy corn? You couldn't pay me to eat it, but it sure does make for one great science lesson! You can even whip this one up for tomorrow if you wanted to add some science fun to your crazy day! This is one activity the class will remember!

All you need for this one is a small cup, some water and one piece of candy. You can give one to each student or just use one demo for the whole class to come to observe. 

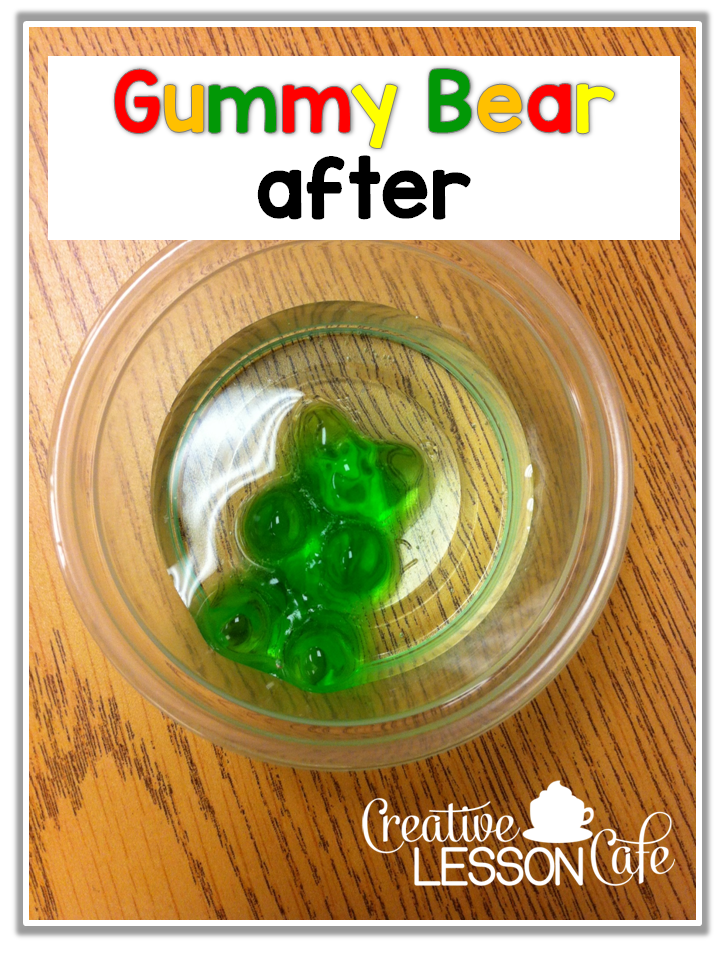
The students asked the question...What will happen when I place a candy corn in water? Most students thought it would dissolve ( YES! They didn't say melt!). Others thought it would get bigger like our gummy bear did in the last experiment, and some thought it would get mushy. 


The changes happened quickly as the students exclaimed that the candy corn was shedding its skin! There is a candy coating that gives the candy corn its shiny smooth texture. That part separates and floats away first.

We waited for about ten minutes and then observed our cups again. 


What was left looked like orange Kool-Aid with a white floaty blob. 
Not a very scientific description, but it works! 

I made a recording sheet for this experiment. 

You can download a copy {here} if you like!
 There's an all black and white version too.

Are you all set for the big day tomorrow? It's the perfect set up for little angels to be transformed into ghouls, isn't it? Kiddos are so excited and going bonkers right now. Something like this might be the perfect thing to keep the calm for at least a little while! 

Here's a throwback this Thursday of my sweet little trick-or-treaters when they were little! 


I wish we could do it all over again!

Whatever you do tomorrow, have a very happy Halloween!
;)

Boo to You! Halloween Freebies!

Kids get so much candy on Halloween! One of my gift ideas this year is to keep it simple and give my students something that I know they will really treasure once the Halloween hoopla ends. A night without homework! YIPPEE! 


If you are still working on an idea for your students, you can grab this little freebie {here}. 

Tonight I am off to spread some holiday hauntings in my neighborhood as I BOO the two teen girls who live down the street. It is great fun to go ring their doorbell at night, run away and hide behind a bush, have a good laugh :) and watch them open the door to find their surprise on the porch!
This is what I got them this year:


No candy, but something from Bath and Body Works I'm pretty sure they will think is very SWEET anyway! 
All of the kids in my neighborhood are growing up, but I refuse to give up this tradition!


I made a new sign and directions so I thought I would share it! 
If you want to start a fun tradition in your neighborhood this Halloween week, you can grab the Boo sign {here}. 

We also BOO at our school. 

You can find the signs for classroom to classroom fun {here}.

I just need another non-food item gift to pair with the homework coupons.
Any great ideas???
:)


Classroom Storage Ideas for Centers and Crafts

It's a fact. Teachers have a lot of STUFF. It can seriously take over the room and bury us alive if we let it! I am back today to share another tip that really helps with classroom organization. My Weekend Warriors friends are also here to share some swell October Organizing ideas with all of you.

This post is all about...


When I found out I would be getting oodles of math centers and manipulatives with our new math series, I honestly had mixed feelings. I am excited to have all of these great materials, but I am pretty much out of storage space without new STUFF coming into the room. If you have storage issues too, you might try what I did!

 If you need to conquer the clutter...hide it and stack it up!

 For storage solutions for my math manipulatives, centers, craft pieces or just about anything... 
 I now look for stacking tubs with lids.


I purchased lots of these beauties at Lakeshore. They were a bit pricey, but SO worth it. They last for years and come in a variety of great colors. I picked up two different sizes. One set is shallow but wide enough to hold recording sheets, game mats and all center materials. Because they have lids, they stack and that saves space!


The other set is deeper and perfect for manipulatives, card sets and other things. 


What I love best about these tubs is the fact that they are so colorful and fun.


 My new bins are great except for the fact that you cannot see what is inside.
 It really helps to have some clear containers for things too.  

I like everything in its place and prepped way in advance.
Here we have my crafts for the rest of October and into November prepped and stored away in Sterilite containers from Target. All of my turkey project pieces are copied, cut apart and ready to assemble!


When our Fun Friday crafting begins, I simply pull out a project tub! 

My goal is to continue to add to my container collection and eventually label everything. It will be a work in progress!


2 Simple Tips for Helping Young Students Learn to Organize Desk Supplies

The one thing that really saves my sanity with my own organization is when I am not distracted by my students being unorganized! 

How many times have you heard this? 
When we are ready to get started on something that involves the students taking out a supply of some kind, I like them to be able to do so quickly and quietly, so we can get the show on the road. Things falling out of desks, supplies getting lost, folders getting ripped and mangled and paper/snack wrapper stuffing are a few frustrations we can all do without. I hope these tips can help your class be more organized!


Spending some time to teach the class to do these two simple things may help those of you who have an issue with desk-cluttering, pencil- fumbling students! 


Because we have desks, not tables, I require that my students keep one, what we call a READY PENCIL, in the side of their desk. The eraser side needs to be showing out and the pencil pushed in against the edge of the desk. That way it won't roll out. When it is time to take out our most frequently used supply, we just grab it out from the corner. It does not involve dragging out the entire noisy pencil box. This one simple trick has saved so much time!

Notice that the books, folders and notebooks above are all nicely stacked. This too was taught and reinforced daily for the first month of school. We divide our desk into two sections. The opposite side is for all other supplies like crayons, glue and pencil boxes.


The students have done a great job keeping their desks tidy without reminders. They still look the same after nearly two months in school. All because we took that extra time to think about and practice organization. I hope they carry these tricks with them through the grades.


To encourage neatness and organization, consider having the desk fairy visit and reward students with a special treat on (or in) their desk!

 I just had to use these cute little fairies from my friend Jen over at Teaching in the Tongass!
 You can grab a copy of the desk fairy notes {here} if you like!

If you have a great idea for organizing, we'd love to hear from you in the comments section.

If you enjoy our monthly tips and tricks, a great way you can keep in touch with the Weekend Warriors is through our Pinterest Board!

 We have quite a collection of awesome ideas to share so Pin away!


 Be sure to follow us there so you don't miss a thing!

This is a great place to come together and share ideas!
 If you have a great tip for organizing, we'd love to hear from you in the comments section. 


October Projects and a Week of Second Grade Fun and Learning Activities!

It wouldn't be the week before Halloween without a whole lot of crafting going on to decorate the room! It was a week of pre-holiday fun, with a whole lot of learning going on, although it doesn't look like it!

1.) Our pumpkin pals turned out oh so cute! We made life cycle booklets to go along with our craft but decided they would be too heavy for the cupboards. Everything falls down in my room. We will add them later. 


 2.) These silly bats from A Cupcake for the Teacher are so easy and lots of fun. We added a little sparkle with purple and green glitter on the wings. The class has been working on a big nonfiction unit on bats and we will continue it for the next few weeks. We have a field trip to the Bat Zone to see live rescued bats and learn more from the experts! 


3.) We've been working on Stellaluna for our genre unit on fantasy all week! The kiddos really enjoyed showing off their fluency as they read to kindergarten buddies today! We also watched a read along video.


4.) This Monster Madness Craftivity was a big hit with the class. 
The kiddos were so creative with their  stories! 
This child wrote that his monster uses echolocation! 

Afterward, for Fun Friday, we started watching Monsters Inc. It's a favorite of mine!

5.) Our school is really getting in the spirit! It is a tradition for classrooms to BOO each other by leaving treats. I surprised another class with a few bags of Halloween Oreos, some fall window clings and some owl stickers inside a sparkly witch hat!
The building is all decorated for our big parade on Friday. 
There are quite a few of these cute dolls set up in our entrance way and other super decorations throughout the halls. 

 Fun stuff!

Thanks for stopping by for a little peek at my week!


Sweet and Simple Science! Gummy Bears Experiment

Happy Sweetest Day friends! Since I am thinking about sweets... I thought I'd share a sweet little lesson from last week. What better time to do activities having to do with candy than in the month of October? We decided to do some simple science with gummy bears!
The question was asked..
 What will happen when we place a gummy bear in a cup of water overnight?

All you need for this experiment is a package of Haribo brand Gummy Bears, some water and small cups. How easy is that? 

These containers from Target were the perfect size. 


So before we plopped the gummy bears in our cups of water, the students made all kinds of great predictions (they are learning the word hypothesis... but haven't been able to say it without a lisp yet)!

Many thought it would melt, so we clarified the difference between melting and dissolving. Others thought it would get slimy. A few predicted it would change color. One student had done this before and she was sworn to secrecy

But no one predicted what would actually happen!


Our bear turned into a mini Jello mold!

As we conducted the experiment, the students recorded the steps of the scientific method. They drew pictures of their observations and listed the steps to the experiment. 

You can grab a copy of this lab sheet here if you think you may want to try this with your class. 

My blossoming scientists were so excited to see their gummy bears and make more observations the next day.


A great variation on this experiment would be to try out different liquids to see what the results would be. You might also repeat it with a different brand of gummy bears to see if all gummies are created equally!

I hope you got some sweet inspiration here today. 
This was a fun and easy way to practice the scientific method.
Maybe give it a try some time!

 I will be back here again tomorrow morning.
Please join me!
 I've got a few SURPRISES in the works for you!
:)


Hilarious Classroom Halloween Party Treats!

Oh my goodness! These are hilarious and SO cute! Have you seen them? I just had to post this picture here to show you! I've been searching Pinterest for new ideas for party treats and gifts for coworkers and the kiddos. If you are planning a party or looking for some yummies for your own child to pass out to classmates, you might like these too! They are good for a laugh either way!


We usually serve up cider and donuts at our classroom party, so this will definitely work!
I spotted bags full of fangs at Target the other day for three dollars and I'm going back for them. 
I'm pretty sure you can pick up the candy eyes at Michael's or Target in the aisle with the baking stuff.
Done! 


October Writing Center with a Little Bling!

Halloween is a BIG DEAL for little ones, so I totally take advantage of their excitement! Our October plan includes a week of spiders, a week of bats, a week of pumpkins and a week of all other fun holiday things with good old Christopher Columbus in the mix as well. If you follow me on Instagram, you saw the photo of this SPOOK-TACULAR writing center I have ready for my kiddos to begin next week. 

To make this lots of fun for our very first writing center, the table is covered with some cute glittery fabric I picked up at Joanne's.
 I also plugged in some orange and purple holiday lights and wove them around items on the table.

Target carries these cauldrons and black pumpkins I have on display.
 I used a rhinestone kit to decorate them.
They are so me!:)


Inside the cauldron are a variety of prompts I think my class is going to LOVE! They include different types of writing tasks. Even though the kiddos have not had formal instruction on all of the genre included, like persuasive writing, I wanted to have them try their hand at it. They always surprise me with what they can do! 

Before we start, I will read each of the cards to them, so they can begin working more independently. I'm pretty sure they are going to be SUPER excited once they hear the tasks! 

You can find the prompt cards in this new set by clicking on the picture below!


There are enough cards here to have each child choose a different task each day throughout the month but it's not necessary to do them all since we are starting a week into October.

I also made a few different writing papers for the students to use to mix it up a bit. Some require writing a list, so there is list paper. One task is to write a letter to a friend, so that stationery is included too. Other papers have cute bats and pumpkins on them that they can color if they finish early. 


Some things they will just write in a spiral notebook, like the acrostic poems, because I want them to set up the letters and I will have plenty of other writing samples to look at.

It's not too late to begin if you want to set up a center of your own or have something like this for Halloween week only. The center is easy to prep which is nice during this busy time of year! You can just do the prompts as a whole-class journal topic too if centers are not your thing.

So my classroom is mostly decorated, but I need to get moving on my house. I can't believe how October just snuck up on me. I live in the neighborhood where I teach, so tons of kiddos will be coming to trick-or-treat and see me! Today is a great day to start pulling out my outdoor bling! 

Thanks for stopping by! I hope you got some fun ideas here to welcome October into your classroom!
:)


Apple Science Activities for Second Grade: Life Cycle Brown Bag Books!

I'm so excited to finally share this super cute project with you after a year of waiting for our apple unit to come around again with a new class! I snapped the last of the photos today as my oh-so-proud-of-themselves second graders shared their finished lunch bag books. My kiddos are totally head over heels in LOVE with their little books. I have not seen such joy in a finished project in a long time, and we make plenty! I think they liked it so much because not only was it a project, but they learned a whole lot about apples and became better readers along the way. 


The prep work for this craft was a piece of cake! That is always a bonus, right? We stapled together a few lunch bags and I made some copies of the pages for the book. The rest was up to the children!

We started out by reading each page that gets glued into the book as we discussed the life cycle of an apple from seed to fruit-bearing tree.

The class worked to color a few pages each day because I wanted them to take their time and have a nice finished project. While they worked, I read some informational texts like this great one about the changes in each season by Gail Gibbons.
The pages were collected daily so they would not get wrinkled, dribbled on or lost. 
You know how that goes!

On book assembly day, we cut out the pieces and laid them all out.

The book was put together as a whole-class craft, step by step.
 It helped to have an example to show them. 
This went very smoothly and all pages were glued right side-up and in the correct order!
Project success!


The last to be completed was a fill in the blank review section. 


This word bank was great for helping them with spelling the words that went in the blanks.

Then the kiddos got to practice reading their books. 
Repeated readings were done as choral reading, a buddy read and finally, for home practice, an independent read! 


My class absolutely loved making and reading their apple life cycle brown bag books! 
They are so excited to get going on the pumpkin bag books soon!

If you think you might like to try out these fun books with your class, you can read more by clicking on the pictures below!


Happy teaching!


Related Posts Plugin for WordPress, Blogger...