Pumpkin Patch Cutie and a Welcome Fall Giveaway!

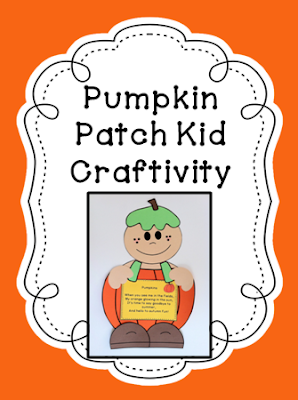
Fall is here and I've got a new project idea to share with you and an awesome giveaway to celebrate this fun season! I made this little guy to go along with our October pumpkin unit! My class will be studying the life cycle of a pumpkin so I made several signs for the pumpkin patch kid! One of them is a mini-book for the kids to illustrate. Click on the first picture to see it at my store!


I'm looking to add some new fun to my pumpkin unit this year. Leave me a comment with your favorite pumpkin themed activity for the classroom or a link to your blog post about it! I'd love to get some new ideas for my second graders!

And for the giveaway....

I don't know about you, but there are so many fantastic giveaways going on out there that I find that I just don't even have time to enter them all! But then I saw one giveaway item that really inspired me to leave a heartfelt comment and sappy plea to win! :)

Imagine my excitement when I was asked to do a review on the item I so hoped to win but did not. The best part is that I got my item after all as a thank you for reviewing it. Let me tell you it was my pleasure!!!

My package arrived at work one afternoon and the custodian delivered it to the classroom! It was a happy day!


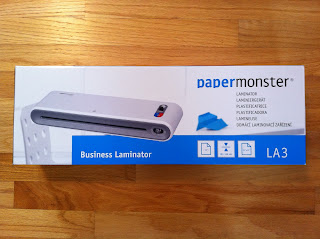
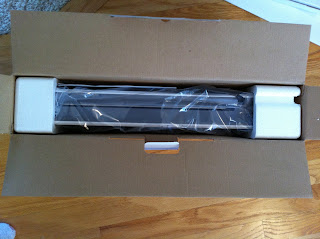
 I rushed to leave school and get home to open it up, take some pictures and try it out! What is in the mystery box? A PAPERMONSTER LAMINATOR! :) Yes!!

I wasn't sure what to expect when I opened it because I only saw a few photos on another blog. That just made it even more exciting! The box was was very light and everything in it so nicely wrapped and packaged.


The cord wraps around inside a slot in the back for easy storage. The laminator is about a foot long and super light! It has rubber feet so it won't scratch your desk or table.

Also in the box were two huge packages of laminating pouches! One of the pouches is for a standard size document and the other pouch size is large enough for a small poster or for two standard size papers side by side.


Everything I needed was all there! I couldn't wait to read the directions and get started! The really fun part was that I got to decorate my Papermonster with STICKERS! They were in the package too!


The directions are only a page long and so simple, I didn't really even need them. I plugged in the cord, slid the power button over to the on position and waited for only FIVE MINUTES for the laminator to get hot. I worried a little that the laminator was going to stink up the house, but there was absolutely no smell at all!


The ready light indicator on top changes from red when waiting to warm to blue when ready to laminate!

The lever is an anti-jam device in case a pouch gets stuck for some reason.


I couldn't believe how fast it was ready! The next step was to place my items to laminate inside the pouch and cover with the top layer of film.

This is the small pouch.

This is the larger size where two can fit inside one pouch.

I put a great deal of trust in this laminator never used before. I was secretly worried about my book basket labels and signs coming out wrinkly or with bubbles as they sometimes do when I laminate at school. I closed the pouch, and fed it gently into the slot. The laminator grabbed the item and slowly fed it through! My fingers were crossed!


The pouches are a little cloudy looking but when heat is applied in the process, you can see how clear the items are. It really made the colors pop for my neon labels!


Here is the result! Fantastic! Not a bubble or wrinkle to be found! 


What surprised me the most was the high quality of the laminating pouches. The film is much thicker and stiffer than any I have ever used before. These labels are truly laminated to last!

Overall, I was incredibly impressed with how easy this small and mighty laminator was to use and the wonderful quality of the machine and pouches! I love my Papermonster!

One lucky winner can get their very own from mybinding.com! How handy it would be to have a laminator for a home office or classroom!


Use the Rafflecopter below to enter the giveaway! Enter once if you're in a hurry like I usually am or as often as you like!The winner will be announced on October 5th! Good luck!


a Rafflecopter giveaway

Johnny or Jenny Appleseed Craft!

Johnny Appleseed and all things apples is one of my absolute favorite units to teach! There are so many fun things to do in the classroom with an apple theme!

I just finished this craftivity to celebrate Johnny Appleseed Day on September 26th! Click on the picture to see it at my TPT shop!


I'm going to have my kiddies write their names in the tin pot cap and let them choose a hair color to look like themselves! There's a little poem I wrote for the sign for Kinders and several different lines to add some writing about the legend of Johnny Appleseed or facts about John Chapman for first and second graders. This will be our fall bulletin board.


Hope you like Johnny and Jenny or Johnny and Bonnie! :)

If you can be first to guess what my favorite apple-themed classroom activity is, I'll email you the file! 

A package arrived at work the other day! I'm so excited to tell you all about it! I've got an awesome giveaway in the works for next week! 


First Week Photos, Freebies, Finds and Fun!

I survived the first week of school! After having been absent from blogging for a while now, I am excited to get back to sharing! It seems like forever since I've even been able to get on the computer to do anything but school work!

The first week was just amazing! I cannot get over how wonderful my class is! They are so mature and responsible compared to how my first graders were at the beginning of the year! It was very encouraging and I am excited to get into a groove this week.

To encourage more of this outstanding behavior, we started our clip chart today! To make the clips more special, I decided to have the kids paint them. We used a small sponge roller from Michael's and acrylic paint in bright colors. Paper plates were perfect paint trays. The kids got to choose some stickers and gems to decorate their clip!


There is a freebie behavior clip chart at my shop that is editable.

Decorating the clips made them heavy and in the middle of our reading lesson, the center of the chart fell right off the ribbon and came crashing down. It is now stapled to a bulletin board! 


Instead of our I can statements, I chose to add Daily 5 CAFE strategies to the Focus Wall because the kids did Daily 5 in first grade and are familiar with them. Each day, I changed them up to fit the read aloud during story time. With so much time spent on routines and procedures, this was the best way to work in my reading lessons for the first week!


You can grab a CAFE Poster set freebie at my Teachers Pay Teachers shop!

This is our Daily Schedule. It's black and bright of course! Let me tell you, it was followed very loosely last week. I always over plan for the first week! I forget how long it takes to unpack supplies, explain all of the routines, and go over expectations. But it helps to keep me on track for sure!


Two days after the start of school, we had our parent night. This was the first year that I had poor attendance. Ten of the 24 students did not have a parent there. I was all prepared with my PowerPoint presentation full of very important information about the year. Luckily, I had many handouts on the desk for reference and have sent those home.


I had sign-up sheets for room parents and party volunteers just out side the door. 
Each parent received a home practice kit which is a huge bag of books, game pieces, novelty items and ready to go learning activities for home practice. Title one grant monies provide these for all students in the building.

On the desk were several forms to fill out with contact information, our special class schedule, a note about Daily 5, my class brochure and a parent wishes form. Parents always have so much they want to share with you about their child, so they were happy to be able to write their wishes for the year since there was not time to chat!


This is the presentation I used. It is editable and is available at my shops!


Still I forgot to mention certain things like the fact that second graders and cupcakes with frosting that stains clothes do not go well together! There's so much to tell in just 25 minutes! We ran two sessions so that parents could attend another classroom for a sibling at another time. I had only 3 parents for session 2 so it was a little less formal!

We made this adorable craftivity from Miss Kindergarten for our open house display board and wrote a recipe for a successful year! I modified the hat to include their name and a title. I forgot to add the shoes to this example!


Parent wishes shared by Funky First Grade Fun went in this little basket from the Target dollar aisle.


This was the gift I gave my students for the first day of school. It is an expandable file from the Dollar Tree for their prize tickets. I called it a prize pouch. Inside was a homework coupon and this poem was attached.


If you think you might like the prize pouch sign for yourself, let me know and I'll throw it in Dropbox for you to download!

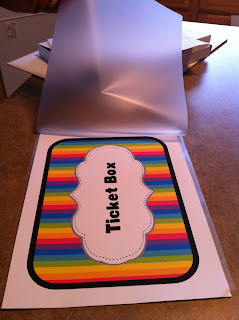
This is our ticket box filled with Mel D's reward coupons! The box is from Michael's too!


This idea is from my teammates! The students write in a composition notebook and the parents write back! There is a freebie sign in my TPT shop!


I've been busy creating signs, signs and more signs! This great editable oval basket template is from Ladybug's Teacher Files. This is what I call my hand-in box for work to be assessed. Next to it is a cup with highlighters and this poster! If you know who has shared this awesome poster, please let me know so I can give credit! Thanks! So many files...


This is the plastic home-school folder the school purchases for all students. It has a clear pocket. I printed a sign on computer paper to match our classroom theme.

Here is our super cute second day of second grade frame. I purchased an open wooden frame from Michael's, glued some letters onto white cardstock and cut around the letters. The pictures of the kids are so darn cute!  Here is just the frame:


This is my student teacher modeling her fine DIY!


Math this week was fun! We did many hands on activities to review sums to ten but also learned how to work together as a group and the expectations for working with manipulatives. This was an activity using two-sided chips. The students toss them and record the combinations for making ten in picture form, and writing equations vertically and horizontally. I love that we get to demonstrate on the Smartboard! Download a recording sheet for shake and toss!


This was an activity for sums to ten called mystery math bags. Students picked out ten items from the bag, sorted them by attribute and wrote addition equations to represent the objects.


This is our sweet year attendance check-in and calendar math. You can see both of them at my shops too!


And finally, my new lamp shade from Walmart! It matches my zebra task chair! What a find!


Thanks for sticking with me for this very long post! There is lots more fun to be had in the second week of second grade so I'll be back with more pictures soon! Hope you all have a wonderful week!
Related Posts Plugin for WordPress, Blogger...